
Many factors intervene in the process of choosing a shutter. It is not a simple process, and in many cases, it is an iterative process in which it is necessary to go back steps to find the best solution. That is why it is advisable to have specialists to ensure an adequate result.
In this article, we propose a simplified process in 10 steps to help you configure your shutter solution yourself. Obviously, the entire selection process must be guided by a search for quality, which is affected by many factors.
Step 1: Choose the installation system
There are 4 possibilities.
Compact system: it is based on a drawer that is assembled together with the window, forming a set that is generally joined in the workshop. It produces a rolling of the shutter “inside” (this means that when the shutter cloth is rolled up, the direction of rolling would “point” towards the interior of the house).
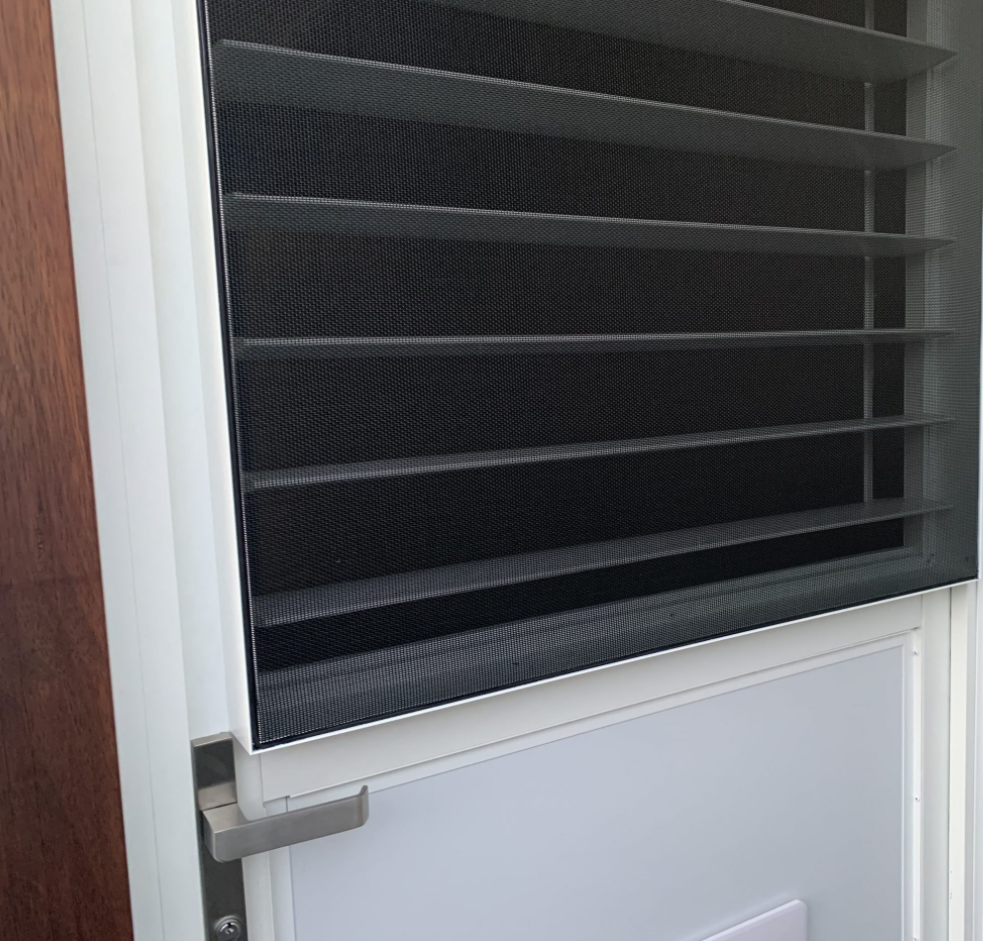
Mini or exterior system: In this system, the drawer is mounted independently from the window on the outside, usually under the lintel.
In the following image we can clearly see this system, which is also common in other types of products such as the Screen Zip.
Prefabricated construction drawer system: In this system, the drawer is a prefabricated element that is installed integrated into the wall. The rest of the shutter elements are installed at a later stage. In this system, registration from the inside is more common, although it can also be done from outside.
Work hole: The fourth system would be the one in which the box is made up of the elements that create the enclosure. The shutter system is made up of the wall anchoring systems and the shaft, pulleys, cloth, guides, and drives that the installer requires.
Step 2. Choose the plank
First, we will choose the material, generally between extruded aluminum, profiled aluminum filled with polyurethane, or PVC.
As a general guide, we will consider the following:
- Extruded aluminum slats: they are more resistant, both to wind and intrusion. For this reason, self-locking slats are usually of this type. They have greater durability. In general, they are more expensive than the rest.
- Profiled aluminum slats filled with polyurethane: combine durability, performance, and economy. They have lower thermal transmittance.
- PVC slats: they have less resistance so the maximum widths are smaller. They are cheaper.
Step 3. Choose type of headboard
The end piece (the element that closes the drawer laterally and to which the loads are transmitted from the shaft) is probably the main element of a blind box. From it emanates a whole set of parts and possible configurations, as we can see below in a simplified. Therefore, your choice is very important, especially in the compact system, where there is more variability.
In general, the end faces are made of plastic or metallic materials with different geometries. For the usual drawer sizes in residential use, the end caps are made of ABS or aluminum, with special variants for easy removal aimed at facilitating the maintenance of the shutter.
Step 4. Choose drawer model and size
In the blind sector, the drawer is understood not only as the set of elements that end up configuring a closed volume where the rolled blind cloth is housed but also as the profiles that “close” that volume by joining the end panels. In the latter case, we would understand “drawer” as the set of four profiles (although sometimes there are more) that close the front, rear, top, and bottom of that volume.
Step 5. Check that the chosen size is sufficient
It is very common to err in the provision of space for the drawer in the lintel solution that the architect initially designed. Given the importance of this point, we dedicate a specific section to it.
To find out if the size of the drawer that we have chosen is sufficient, refer to the Rolling Tables, generally present in the blind catalogs.
Step 6. Choose the type of drive

There are several types of shutter drive, although the most common are belt drive and pick-up, and motor drive.
The main reasons for opting for one drive or another are these:
- Economy : The belt drive and pickup is more economical, although the motors have fallen dramatically in price in the last decade.
- Weight of the blind : when the gap is very large and / or the blind is very heavy, it is necessary to use a motor.
- Airtightness : if you are looking for a very hermetic drawer, you will have to go to motor-driven drawers, since both the belt passer and the point of attachment of the collector to the guide (if it is embedded as usual) can be points of air loss as we see in the images below.
Acoustics : motorized drawers, being more hermetic, have better acoustic behavior. For regulatory compliance, consider motorized drives.
- Degree of mobility of the people : the belt drives of blinds of a certain size can be difficult for the elderly or people with reduced mobility, so it is convenient again to opt for motor.
Step 7. Choose the drive, winding, and registration output
This is especially important in mini-type systems, prefabricated work box and work space.
Depending on where the blind is located, a search from inside the house may be mandatory. This will determine where the blind can roll (inside or outside winding), and it can also determine where the components of the blind drive must exit from the drawer (eg the motor cable).
Step 8. Choose the guides
The choice of guides is not a minor issue. In many cases, the guide is linked to the window supplier, rather than the shutter supplier. A study of the assembly is necessary, especially to ensure the correct relative positioning of the WINDOW – BLIND DRAWER – WORK, which is conditioned by the guide. There are many options. In this image, we collect some in a schematic way.
Step 9. Choose the colors
The color options given by the manufacturer depend mainly on the material and manufacturing technology of the component.
The articles of aluminum extrusion can be performed on lacquered finishes, anodized, and woodgrain. There are special lacquers, such as textured ones. It is easier to make special colors in this type of product.
The items made of profiled aluminum are available in lacquered and imitation wood finishes. In general, a large number of pieces is necessary for special colors, due to the manufacturing process itself.
In PVC components, and in general in all plastic products, the color is given in the mass, or with foliated finishes if they are extruded products, such as the guides and the PVC drawer. Some components can be lacquered for small runs, although they may have worse scratch behavior and this should be taken into account when choosing.
Step 10. Perform the Compliance Check
If it is necessary to comply with the regulations (because it is a project of the types that are thus included in the Technical Building Code) it will be necessary to check that the hole complies (hole understood as the set of elements that compose it, not just the blind).
This point is technically complex and extensive, so we will not go into detail. We will only mention that in our opinion there are 3 most relevant points that affect the blind:
- Wind resistance
- Compliance with the Energy Saving section (DB HE of the CTE), especially the thermal bridge of the lintel
- Compliance with the Noise Protection section (DB HR of the CTE)